The Best Starter Sewing Machine: A Beginner’s Guide
So, you’ve decided to dive into the wonderful world of sewing. Perhaps you’ve unearthed a forgotten fabric stash, seen a breathtaking garment online, or simply yearn for the satisfaction of creating something with your own two hands. Whatever your motivation, congratulations! You’re on the cusp of a rewarding journey. But before you can stitch that first seam, you need a trusty companion: your first sewing machine. And that, my friend, is where this guide comes in. Navigating the vast sea of sewing machines can feel overwhelming, with terms and features flying at you like stray threads. Fear not! This beginner’s guide is designed to demystify the process, helping you find the best starter sewing machine that will not only get you sewing but also inspire you to keep creating.
Let’s address the elephant in the room – or rather, the antique sewing machine gathering dust in the attic. While those vintage machines often possess a certain charm and robustness, they might not be the ideal starting point for a modern beginner. A dedicated starter sewing machine offers a blend of user-friendliness, essential features, and modern convenience that will foster a positive and encouraging learning experience. Think of it as building a strong foundation for your sewing skills.
Understanding the Benefits of a New Machine
- Ease of Use: Modern starter machines are engineered with beginners in mind. They often feature intuitive controls, clear labeling, and streamlined threading systems that minimize frustration. You won’t be fumbling with obscure levers or deciphering ancient diagrams.
- Consistent Performance: A new machine will deliver predictable results. You’ll experience consistent stitch tension, smooth fabric feeding, and reliable motor performance. This consistency is crucial for building confidence and understanding how different fabrics behave.
- Essential Features, No Overkill: Starter machines provide the core functionalities you need to tackle a wide range of beginner projects. You’ll get straight stitches, zigzag stitches, and perhaps a few decorative options, which are more than enough to get you started. You won’t be paying for advanced embroidery or quilting features you don’t need (yet!).
- Safety and Reliability: Newer machines often incorporate safety features like needle guards and automatic shut-offs. They are also built to modern manufacturing standards, ensuring a reliable and safe sewing experience.
- Warranty and Support: Purchasing a new machine typically comes with a manufacturer’s warranty. This provides peace of mind, knowing that if something goes wrong, you have recourse and support available.
Learning Curve: When Simplicity is Key
It’s easy to be tempted by the allure of a machine with dozens, even hundreds, of stitch patterns. However, for your initial foray into sewing, simplicity is your greatest ally. A machine with too many options can be daunting and even counterproductive. You need to learn the fundamental techniques first, like threading the machine, winding a bobbin, sewing a straight seam, and managing different fabric types. A basic machine allows you to focus on mastering these skills without getting bogged down by superfluous functions.
Setting the Stage for Future Growth
The best starter sewing machine isn’t just about your first project; it’s about building a foundation for a lifelong hobby. As you grow in your sewing journey, you’ll naturally discover what features you truly need and enjoy. A good starter machine will equip you with the basic skills and confidence to later upgrade to a more specialized machine if your interests evolve towards quilting, dressmaking, or embroidery. It’s an investment in your creative future.
Key Features to Look for in Your First Sewing Machine
Now that you understand why a dedicated starter machine is the way to go, let’s delve into the specific features that will make your sewing experience enjoyable and effective. Think of these as your essential checklist when browsing your options.
The Absolute Essentials: Must-Haves for Beginners
- Adjustable Stitch Length and Width: This is non-negotiable. The ability to adjust stitch length allows you to control the density of your stitches, crucial for different fabric weights. Adjustable stitch width is vital for zigzag stitches, used for finishing seams and creating decorative effects.
- Reverse Stitch (Backstitch) Lever/Button: Every machine needs a reverse function. This allows you to secure your stitches at the beginning and end of a seam, preventing them from unraveling. Look for a lever or button that’s comfortable and easy to engage.
- Feed Dog Control: The feed dogs are the little teeth that grip and move your fabric under the needle. Being able to lower or disengage them is important for free-motion sewing (like darning or simple quilting) and for attaching buttons. Many starter machines offer this, though it might be a lever or a removable plate.
- Standard Needle System: Most modern machines use a universal needle system (like the HAx1 or 2020 system). This means you can easily find replacement needles from various brands. Avoid machines that use proprietary or hard-to-find needle types.
- Adequate Lighting: A well-lit needle area is crucial for accurate sewing. Many starter machines have a built-in LED light, which is far superior to older incandescent bulbs.
Useful Additions: Features That Enhance Convenience
- Free Arm Capability: This is a feature that allows you to remove a portion of the machine’s base, creating a narrow cylinder. This is incredibly helpful for sewing sleeves, pant legs, and other “in-the-round” items. Most modern machines have this.
- Thread Cutter: While seemingly minor, a built-in thread cutter can save you a lot of fiddling. It allows you to snip the threads cleanly after sewing without needing scissors every time.
- Top-Loading Bobbin System: Bobbins that load from the top, with a clear cover, are generally easier to manage. You can often see how much thread you have left, and they are less prone to jamming than older front-loading systems.
- Threader, Anyone? A Built-in Needle Threader: This is a game-changer for many beginners. A needle threader significantly simplifies the often-frustrating task of getting the thread through the tiny eye of the needle. While not perfectly foolproof for everyone, it’s a feature worth seeking out.
- Variety of Presser Feet: Most starter machines come with a basic set of presser feet, usually including a general-purpose foot, a zipper foot, and a buttonhole foot. Make sure these essential feet are included. You can always purchase more specialized feet later if needed.
- Stitch Patterns: What to Focus On: For a starter machine, don’t get caught up in the sheer number of stitch patterns. Focus on the core ones:
- Straight Stitch: Your workhorse for most seams.
- Zigzag Stitch: Essential for finishing seams, preventing fraying, and basic appliqué.
- Buttonhole Stitch: Most machines offer a one-step or four-step buttonhole. Either is fine for beginners.
- Optional but nice: A few simple stretch stitches (if you plan on sewing knits) or a decorative stitch or two for adding flair.
Types of Beginner Sewing Machines: An Overview

The world of sewing machines isn’t monolithic. For beginners, you’ll primarily encounter two main categories: mechanical and electronic (often referred to as computerized). Understanding their differences will help you align your choice with your budget and technical comfort level.
Mechanical Sewing Machines: The Reliable Workhorses
Mechanical machines are the traditionalists. They operate using dials and levers to select stitches, adjust length, and control tension. They are often praised for their durability and straightforward design.
- Pros:
- Simplicity: Fewer moving electronic parts means potentially fewer things to go wrong.
- Durability: Often built with robust metal components.
- Ease of Repair: Generally easier for a local technician to diagnose and fix.
- Affordability: Typically more budget-friendly than electronic counterparts.
- Cons:
- Limited Stitches: Usually offer a smaller selection of basic stitches.
- Dial Adjustments: Fine-tuning stitch length and width can sometimes be less precise than with digital controls.
- Manual Tuning: Thread tension adjustments might require a bit more understanding and manual tweaking.
Electronic (Computerized) Sewing Machines: Modern Convenience
Electronic machines use circuit boards and digital interfaces to control their functions. They often boast a wider array of stitches and features, controlled by buttons and displays.
- Pros:
- More Stitches: Access to a larger variety of decorative and utility stitches.
- Precise Adjustments: Digital controls allow for highly accurate stitch length and width settings.
- Ease of Operation: Often have intuitive buttons for selecting stitches and functions.
- Advanced Features: May include features like needle up/down, speed control, and automatic thread cutters.
- Cons:
- Higher Cost: Generally more expensive than mechanical machines.
- Complexity: More electronic components can mean potentially more complex repairs.
- Power Dependency: Relies completely on a stable power source.
What About Sergers and Coverstitch Machines?
It’s worth briefly mentioning other types of sewing machines you might encounter, but for a true beginner: avoid them for now. Sergers (overlock machines) and coverstitch machines are specialized tools for finishing seams with professional-looking edges and hems. While incredibly useful for advanced sewers, they have a steep learning curve and are not suitable as your first general-purpose sewing machine. Stick to a standard domestic sewing machine for now.
Making Your Decision: Factors to Consider

With the machine types and essential features in mind, it’s time to bring it all together and make a decision that’s right for you. This is where you’ll consider your personal circumstances, aspirations, and budget.
Budget: How Much Should You Expect to Spend?
The price range for starter sewing machines is quite broad, but you can find excellent options without breaking the bank.
- Entry-Level Mechanical Machines: You can find reliable mechanical machines starting from around $100 to $250. These will offer the essential stitches and functions for basic projects.
- Mid-Range Mechanical/Basic Electronic Machines: For a bit more versatility and features like needle threaders or a few more stitch options, expect to spend between $250 and $400. This is often the sweet spot for many beginners, offering a great balance of features and price.
- Higher-End Electronic Machines: If your budget allows and you’re keen on more advanced features like more decorative stitches, LCD screens, or better speed control, you might look into machines in the $400 to $600 range. However, for your very first machine, it’s often wiser to start more modestly.
Remember that a cheap machine that is difficult to use will quickly become a frustrating paperweight. It’s better to invest a little more in a well-regarded entry-level or mid-range machine than to buy the absolute cheapest option.
Your Sewing Goals: What Do You Want to Make?
Your aspirations will directly influence the features you should prioritize.
- Basic Alterations and Repairs: If you’re mainly looking to hem pants, fix seams, or sew on buttons, a simple mechanical machine with a good straight stitch and zigzag stitch will suffice.
- Simple Garments and Home Decor: As you move into making tote bags, simple skirts, pillows, or even beginner garment patterns, having adjustable stitch width and length, a free arm, and a good selection of basic stitches will be more important.
- Projects with Knits: If you’re drawn to sewing t-shirts, athleisure wear, or children’s clothing, look for machines that offer specific stretch stitches (like a tricot stitch or a three-step zigzag). However, most basic machines with a good zigzag can handle lighter knits with the right needle and technique. You can always add a dedicated coverstitch machine later.
Brand Reputation and Reviews: Doing Your Homework
Once you have a few models in mind, it’s time to tap into the wealth of information available online.
- Reputable Brands: Stick to well-known and respected sewing machine brands. Companies like Singer, Brother, Janome, and Bernette (a sub-brand of Bernina) have a long history of producing quality machines and generally offer good customer support.
- Read User Reviews: Websites like Amazon, sewing blogs, and online sewing communities are invaluable resources. Pay attention to recurring themes in reviews – both positive and negative. Look for comments on ease of use, durability, noise levels, and the quality of customer service.
- Watch Video Reviews: YouTube is an excellent place to see machines in action. You can observe how the stitches look, how the machine handles different fabrics, and get a feel for its operation.
Bringing Your Machine Home: Setup and First Steps
| Feature | Description |
|---|---|
| Stitches | Number of built-in stitches available |
| Bobbin Type | The type of bobbin used (drop-in, front-loading, etc.) |
| Needle Threader | Whether the machine has an automatic needle threader |
| Presser Feet | Number and type of included presser feet |
| Weight | The weight of the machine for portability |
Congratulations, you’ve chosen your machine! The excitement is palpable. Now, let’s get it ready for its maiden voyage and ensure your first sewing experience is as smooth as possible.
Unboxing and Familiarization
- Read the Manual (Seriously!): This might sound mundane, but your machine’s manual is your best friend. It will guide you through every step of setup, operation, and maintenance. Keep it handy!
- Identify All Accessories: Lay out all the included presser feet, bobbins, needles, and any other accessories. Familiarize yourself with what each one is for.
- Locate Key Controls: Spend some time identifying the stitch selector, stitch length/width dials, reverse lever, tension control, and power switch.
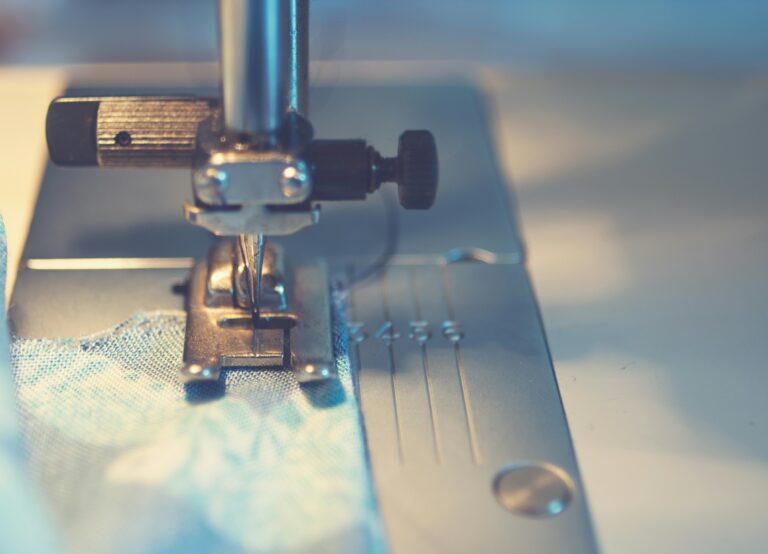
Threading Your Machine: The First Hurdle
Threading a sewing machine is a skill that, once mastered, becomes second nature. Modern machines have made this process significantly easier.
- Follow the Manual’s Diagrams: Threading paths are usually clearly marked on the machine itself with numbers or arrows. Always follow the manual’s specific instructions.
- Upper Threading: Ensure the presser foot is UP when threading the upper thread. This opens the tension discs, allowing the thread to engage correctly.
- Bobbin Winding: Most machines have a dedicated bobbin winding mechanism. Follow the instructions to wind a bobbin evenly. A poorly wound bobbin is a common source of stitching problems.
- Lower Threading (Bobbin): Carefully insert the wound bobbin into its casing, ensuring the thread is pulled through correctly (usually according to a diagram). Pull the bobbin thread up through the needle plate.
Your Very First Stitches: Practice Makes Perfect
Before you embark on a grand project, it’s crucial to practice. This will help you get a feel for the machine and troubleshoot any initial issues.
- Scrap Fabric Practice: Use scrap pieces of inexpensive fabric (like cotton or broadcloth).
- Straight Stitch Practice: Sew straight lines at different speeds. See how the machine handles the fabric. Experiment with varying stitch lengths.
- Zigzag Stitch Practice: Practice sewing zigzag stitches along the raw edges of fabric scraps to see how they prevent fraying. Experiment with different widths and lengths.
- Tension Test: Many manuals include instructions for performing a tension test. This involves sewing a sample with consistent stitch length and observing if the stitches are balanced on both sides of the fabric. If not, you’ll learn to make minor adjustments to the tension dial.
- Buttonhole Practice: Once you’re comfortable with basic stitches, try sewing a few buttonholes. This usually involves following a specific sequence on the machine.
Basic Maintenance: Keeping Your Machine Happy
A little regular care will ensure your machine runs smoothly for years to come.
- Cleanliness is Key: After each sewing session, use a small brush to remove lint and dust from around the needle plate and bobbin area.
- Occasional Oiling: Some machines require occasional oiling. Check your manual for recommendations on where and how often to apply machine oil.
- Needle Changes: Change your needle regularly (after every 8-10 hours of sewing, or when you notice skipped stitches or thread fraying).
Embarking on your sewing journey with the right starter machine is an exciting prospect. By understanding the essential features, considering your needs, and following these simple steps, you’ll be well on your way to creating, mending, and enjoying the incredibly satisfying world of sewing. Happy stitching!
FAQs
What should I look for in a starter sewing machine?
When looking for a starter sewing machine, consider features such as easy threading, adjustable speed control, a variety of stitches, and a built-in needle threader. It’s also important to choose a machine that is user-friendly and durable.
What is a good budget for a starter sewing machine?
A good budget for a starter sewing machine is typically between $100 to $200. There are many quality machines available in this price range that are suitable for beginners.
What are some recommended starter sewing machine brands?
Some recommended starter sewing machine brands include Brother, Singer, Janome, and Juki. These brands offer a range of models with beginner-friendly features and good value for the price.
What types of projects can I do with a starter sewing machine?
With a starter sewing machine, you can work on a variety of projects such as simple clothing alterations, basic garment construction, home decor items like curtains and pillow covers, and small crafts like bags and accessories.
Are there any additional accessories or tools I should consider purchasing with a starter sewing machine?
Some additional accessories or tools to consider purchasing with a starter sewing machine include extra bobbins, sewing machine needles, fabric scissors, a seam ripper, and a measuring tape. These items can help you get started with your sewing projects and make the process more efficient.